
Key Takeaways
A simple maintenance rhythm keeps your robot vacuum working consistently and helps you catch small problems before they become expensive ones.
- Empty the dustbin regularly and clean airflow paths before buildup restricts suction.
- Remove hair from the main brush, side brushes, wheels, and brush housing.
- Tap or rinse filters only when the manufacturer allows it, and let washable filters dry fully.
- Wipe sensors and charging contacts with a soft, dry cloth.
- Test the robot after cleaning so you can spot weak suction, missed areas, or unusual noise.
- Build a robot vacuum maintenance routine
- Clean the brushes and brush housing
- Wash and replace the filters correctly
- Wipe the sensors and charging contacts
- Empty and clean the dustbin
- Inspect wheels, mops, and other moving parts
- Troubleshoot performance after maintenance
- Conclusion
- Frequently Asked Questions
Build a robot vacuum maintenance routine
Robot vacuum maintenance is easier when you treat it as a short routine rather than a major chore. A quick check after several cleaning runs can prevent hair, dust, and residue from affecting several parts at once. The right schedule depends on your floors, pets, and how often the robot runs.
How often to clean each component
Empty the dustbin whenever it is full or after a particularly dusty cleaning session. Check the main brush and side brushes weekly in a pet-friendly home, while filters, sensors, wheels, and charging contacts need regular inspection even when they look reasonably clean.
A useful starting schedule is below. Adjust it when you notice heavier debris, reduced suction, or a change in the robot’s movement.
| Component | Starting interval | What to look for |
|---|---|---|
| Dustbin | After each run or when full | Packed debris, odors, restricted intake |
| Main and side brushes | Weekly | Hair, threads, wobbling, worn bristles |
| Filter | Weekly check; clean as allowed | Dust coating, damage, reduced airflow |
| Sensors and contacts | Every few weeks | Smudges, dust, poor docking |
This is a starting point, not a rigid rule. A home with long hair, shedding pets, or construction dust may need more frequent attention.
Signs your robot vacuum needs attention
Watch for debris left behind, a brush that stops turning, repeated docking failures, or a motor that sounds different. A robot that circles, bumps into familiar furniture, or stops before finishing may also need cleaning rather than immediate repair.
Keep a note of when you clean each part if you are still learning your home’s rhythm. That small habit makes maintenance planning tips useful beyond the vacuum itself, especially when you are comparing replacement supplies and ownership costs.
Supplies that make maintenance easier
You do not need a large toolkit. A soft brush, dry microfiber cloth, blunt tweezers, a small waste container, and clean water for approved washable parts will cover most routine work.
Keep replacement filters and brushes matched to the exact model. Generic-looking parts can differ in size, seals, mounting points, or material, so check the manual and model label before ordering.
Safety steps before cleaning
Turn the robot off, remove it from the dock, and disconnect the dock from power when the manual advises doing so. Work on a clear, dry surface and keep loose screws, hair, and cleaning liquids away from children and pets.
Never pour water into the robot body or use a damp cloth near exposed electrical contacts. If a part is difficult to remove, stop and check the instructions rather than forcing it.
Clean the brushes and brush housing
The brushes do much of the physical work, so they collect hair, threads, crumbs, and fine dust quickly. Cleaning them protects the brush motor and helps the robot move debris toward the intake instead of pushing it around. Set removed parts on a clean towel so you can return them in the correct orientation.
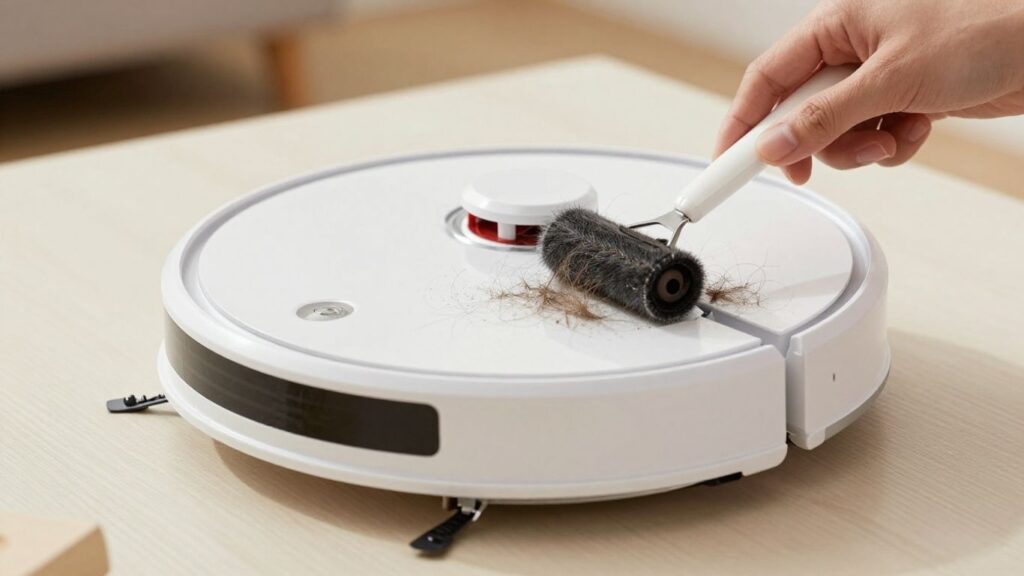
Removing hair and debris from the main brush
Open the brush guard according to your model’s instructions and lift out the main brush. Pull away wrapped hair with your fingers or blunt tweezers, then brush dust from the housing and the ends of the brush.
Check the channel beneath the brush as well. Hair can form a tight band there even when the visible bristles look clean, and that hidden resistance may cause noise or uneven rotation.
Maintaining the side brushes
Remove each side brush carefully, since hair often winds around its center and beneath the hub. Wipe the hub and mounting point before reinstalling the brush, making sure it sits flat and turns without catching.
Bent bristles may still collect some debris, but they can reduce edge cleaning and make the robot behave unevenly. Replace a side brush when cleaning no longer restores its shape.
Checking brush caps, bearings, and axles
Inspect the small caps, bearings, and axles at both ends of the main brush. They should be free of packed hair and should turn smoothly without grinding or excessive looseness.
Do not add oil unless the manufacturer specifically calls for it. Lubricant can attract dust and create a sticky paste inside the brush housing.
Replacing worn or damaged brushes
Replace a brush when bristles are visibly worn, the roller is cracked, an end cap is damaged, or the brush repeatedly slips out of place. Use the model number when searching so the replacement matches the mounting system.
A replacement brush is not a cure for a blocked housing. Clean the cavity first, install the new part evenly, and run a short test on a clear floor.
Preventing tangles in homes with pets
Long pet hair and human hair are easier to manage when you inspect the main brush before the wrap becomes tight. Frequent small cleanups are gentler than waiting until the brush is locked by a dense bundle.
The Narwal robot vacuum maintenance guide also frames routine care around strong suction, accurate navigation, and clean floors; those are useful performance checks for any model, without turning a general routine into a product guarantee.
Wash and replace the filters correctly
Filters protect airflow and help keep fine dust from circulating back into the room. They also clog quietly, so a robot may sound normal while collecting less debris. Handle filter media gently because a torn edge or loose seal can undermine the whole cleaning path.
Finding and removing the filter
The filter is commonly located in or beside the dustbin, but its shape and release method vary. Remove the dustbin first, open its filter compartment, and note how the filter sits before pulling it out.
Take a quick photo if the assembly is unfamiliar. That makes it easier to return the filter and any supporting screen in the correct order.
When to tap, rinse, or replace a filter
Tap a dry, non-washable filter over a waste container rather than brushing it aggressively. Rinse a filter only when the instructions identify it as washable, and replace it when the media is damaged, permanently clogged, or no longer seals properly.
If the filter looks clean but suction remains weak, inspect the intake and brush housing too. Airflow problems rarely come from one component alone.
Why wet filters can damage a vacuum
A wet filter can restrict airflow and may allow moisture to reach internal components when the robot runs. Even a filter that feels dry on the surface can hold water in its folds.
After washing, place it in a ventilated area until it is completely dry before reinstalling it. Keep a spare compatible filter if the robot runs daily and drying time would interrupt your routine.
Choosing compatible replacement filters
Match replacement filters by model number and physical design, not only by a product photograph. Check the frame, gasket, folding pattern, and any included mesh screen before buying.
If you are comparing supplies, consider the full ownership cost rather than the lowest single price. A practical product comparison guide can help you weigh fit, frequency of replacement, and the convenience of keeping spares available.
Improving suction through regular filter care
A clean, dry, correctly seated filter lets the airflow system work as intended. After reinstalling it, close the dustbin firmly and check that no edge is folded inward.
Run the robot briefly and listen for a change in tone. If suction still seems poor, continue with the dustbin, intake, brush, and wheel checks instead of repeatedly washing the same filter.
Wipe the sensors and charging contacts
Sensors guide movement, detect edges, and help the robot find its dock. Dust or fingerprints can interfere with those readings, while dirty charging contacts can prevent a complete charge. Use a gentle touch and keep moisture away from openings.
Cleaning cliff, navigation, and wall sensors
Use a clean, dry microfiber cloth on visible sensor windows and wall-sensing areas. Wipe in small passes rather than pressing grit across the surface, then inspect the underside for dust near cliff sensors.
Afterward, place the robot on a clear floor and watch one short movement cycle. This simple test can reveal whether a sensor was blocked or whether the original problem lies elsewhere.
Removing dust from the camera or laser module
If your model has a camera or laser module, remove loose dust from its exterior with a soft, dry cloth. Do not insert tools into the module or spray cleaner directly onto it.
A cloudy window can affect navigation, but internal faults require service. Avoid dismantling the module during routine cleaning unless the manufacturer provides explicit instructions.
Maintaining charging contacts and the dock
Wipe the robot’s charging contacts and the matching dock contacts with a dry cloth. Remove dust from the dock base and keep the approach clear so the robot can align without pushing against objects.
If the robot docks but does not charge, check for residue, misalignment, and a power connection at the dock. Repeated failed charging after those checks may indicate a deeper electrical problem.
Avoiding scratches, moisture, and harsh cleaners
Do not use abrasive pads, strong solvents, or excess water on sensor windows or contacts. A clean cloth is usually safer than a chemical spray, particularly around cameras, laser covers, and charging points.
Keep the robot upside down only as long as needed and support it so the sensors are not pressed against a hard surface. Gentle handling prevents a maintenance task from creating a new fault.
Troubleshooting navigation and docking problems
Start with the basics: clean the sensors, clear the dock approach, remove tangled wheels, and confirm that the dock has power. Then run a short test in a familiar area with loose cables and small objects removed.
If the robot still misses sections or cannot locate the dock, check the app or manual for model-specific resets and mapping instructions. Do not assume every navigation problem is caused by dirt.
Empty and clean the dustbin
The dustbin is where collected debris, hair, and fine dust accumulate, so it deserves more than a quick shake. A clean bin helps preserve airflow and reduces the chance that old debris will spill back onto the floor. Empty it over a waste container and avoid compressing dusty contents by hand.
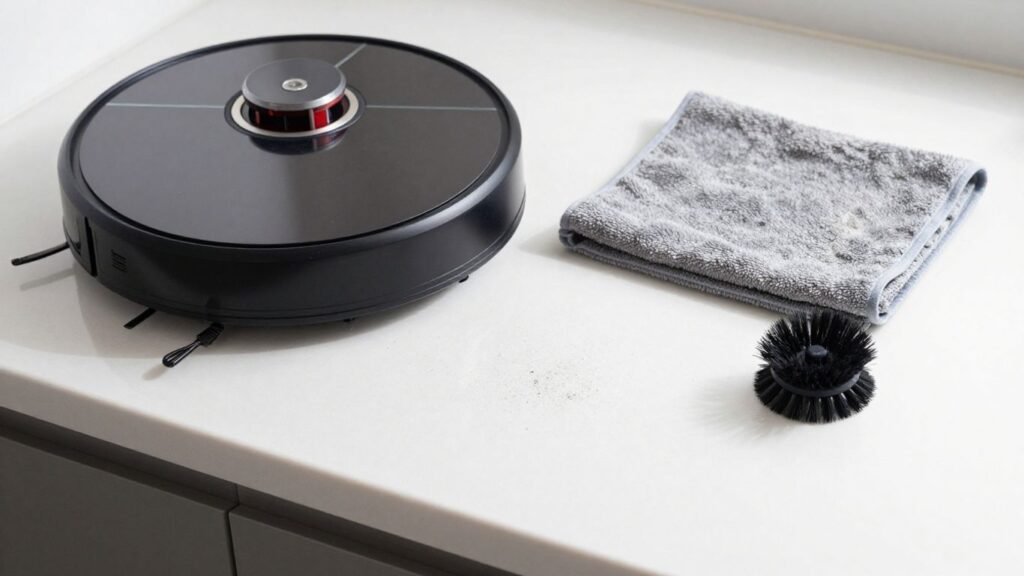
How often to empty the dustbin
Empty the bin after each run if it fills quickly, if you have pets, or if the robot’s capacity is small. Otherwise, empty it as soon as the full-bin indicator appears or before a longer scheduled cleaning.
Leaving debris packed inside can obstruct the intake and make later cleaning messier. A quick emptying habit is usually faster than clearing a hardened blockage.
Cleaning the bin, intake, and airflow paths
Remove the bin and shake out loose debris, then use a soft brush or dry cloth on the interior. Inspect the intake opening and airflow channels for compacted dust, hair, or scraps of paper.
Wash the bin only if the instructions allow it, and dry it fully before replacing it. Keep water away from electronic parts and from any filter that is not marked washable.
Maintaining self-emptying dock bags
If your system uses a self-emptying dock bag, replace it when full or when airflow appears restricted. Close or handle the bag carefully so fine dust does not spill into the dock.
Inspect the dock’s inlet for obstructions after changing the bag. A new bag cannot compensate for a blocked passage between the robot and the dock.
Checking the full-bin sensor
Wipe the full-bin sensor area with a dry cloth and make sure the bin is seated firmly. A false full-bin warning can result from dust on the sensor, a bin that is not fully closed, or an obstruction near the detection point.
Test the robot after reseating the bin. If the warning returns while the bin is empty and clean, consult model-specific support rather than repeatedly forcing the latch.
Managing odors, allergens, and pet hair
Empty dusty contents slowly and consider wearing a mask if fine particles bother you. Wash approved washable parts separately, let them dry completely, and replace filters that retain a strong odor after cleaning.
For homes with pets, brush the bin opening and intake more often than the larger bin surfaces. The Roomba 600 series care guide similarly covers dustbin, brush, and filter upkeep as separate routine tasks, which is a helpful way to organize your own checks.
Inspect wheels, mops, and other moving parts
The robot’s wheels and floor-contact parts determine whether it can move, turn, and clean evenly. Hair and grit can hide around axles, while damp mop components can leave residue if they are stored wet. Inspect these parts whenever the robot begins dragging, veering, or making a repetitive sound.
Clearing debris from the drive wheels
Turn the robot off and examine each drive wheel for hair, thread, and grit around the axle. Press the wheel gently through its normal movement and remove debris without pulling hard on the suspension.
Both drive wheels should respond similarly. If one stays depressed, feels loose, or resists movement after cleaning, stop using the robot until the cause is understood.
Cleaning the caster wheel
The small caster wheel collects hair and grit beneath its fork. If the design allows removal, lift it out carefully, clear the axle and housing, and reinstall it so it turns freely.
A dirty caster can make the robot drift or vibrate, especially on smooth floors. Test a straight path after cleaning rather than judging the wheel only by appearance.
Maintaining the mopping pad and water tank
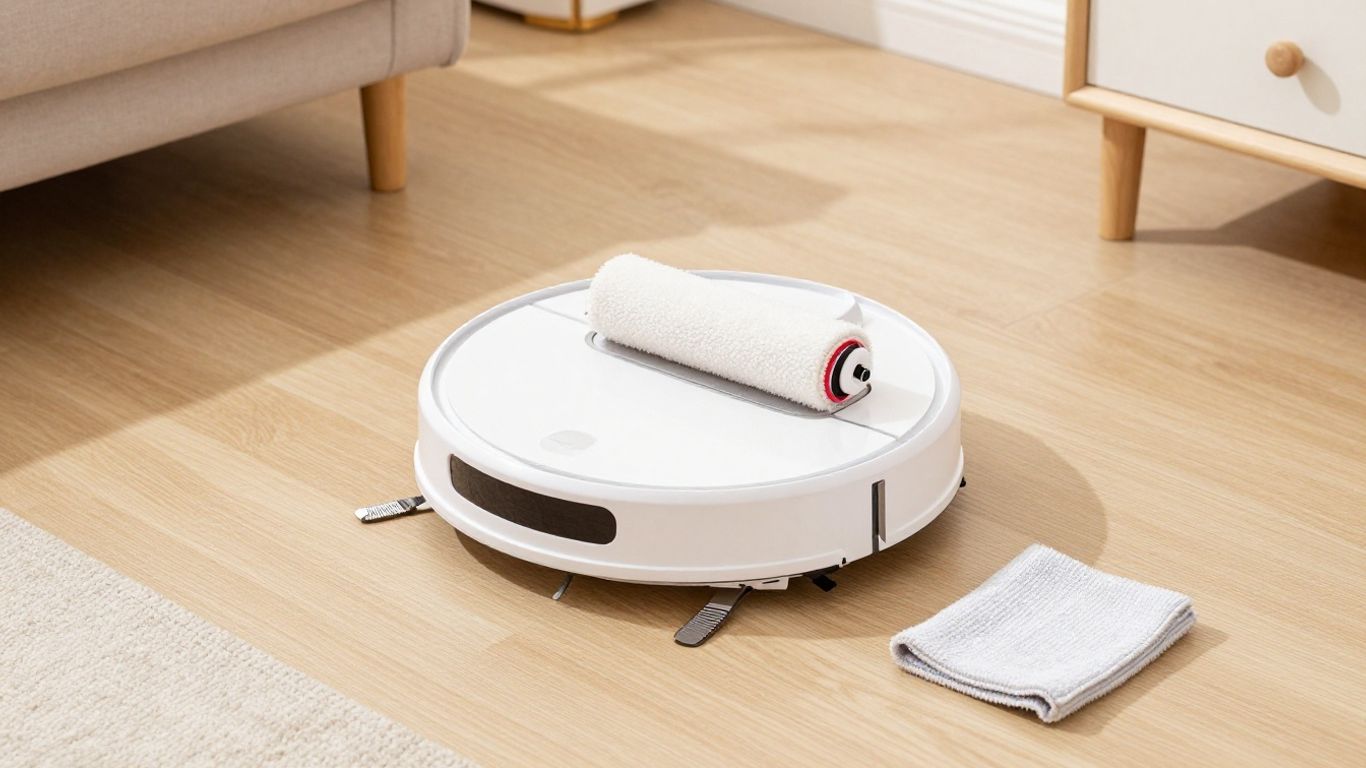
Remove the mopping pad after use and wash or replace it according to the instructions. Empty the water tank, wipe its exterior, and allow the pad and tank area to dry before storage.
Do not leave standing water in the robot or add cleaning chemicals unless the manufacturer explicitly permits them. Residue can affect the tank, pad, floor, or internal water path.
Checking the brush guard and seals
Inspect the brush guard, bin seal, and other rubber edges for trapped grit, tears, or deformation. A loose seal can allow dust to bypass the intended airflow route or make a panel rattle during operation.
Clean mating surfaces before closing the parts. If a seal no longer sits flat, replacement is usually more reliable than trying to reshape it.
Identifying parts that need replacement
Replace parts that are cracked, warped, split, excessively worn, or unable to stay secured. Take note of the model number and part name before ordering, since similar-looking components may not fit.
Keep the old part until the new one arrives if the robot can remain safely out of service. Comparing the two pieces before installation can reveal a mismatch early.
Troubleshoot performance after maintenance
A short test run turns maintenance into a useful diagnosis. Start with an empty bin, a dry filter, clear brushes, clean sensors, and a charged battery, then observe the robot on a familiar area. Change one thing at a time so you can identify what helped.
What to check when suction is weak
Check the filter, dustbin intake, brush housing, and airflow channels in that order. Confirm that the filter is dry and seated correctly, the bin latch is closed, and the main brush turns without resistance.
Fine dust may be packed deeper than a quick visual check reveals. If cleaning does not restore performance, inspect seals and consult the manual before opening the robot body.
Fixing unusual noises and vibration
A new rattle often comes from a loose brush guard, trapped hair, a damaged side brush, or debris in a wheel. Turn the robot off, remove the suspected part, and compare its movement with the other side.
Do not keep running the robot through a loud grinding sound. Continued operation can turn a small obstruction into damage to a motor or mounting point.
Resolving missed spots and uneven cleaning
Clean the sensors, check the wheels, and confirm that the brush and bin are installed correctly. Also look for furniture changes, closed doors, loose cables, or floor transitions that may alter the route.
If the robot maps normally but leaves debris, focus on brushes, filter condition, and suction. If it navigates poorly, focus first on sensors, wheels, and the dock area.
Improving battery and runtime performance
Clean the charging contacts, keep the dock approach clear, and make sure the robot reaches the dock fully. Extra resistance from tangled brushes or wheels can also shorten a cleaning run because the machine works harder to move and collect debris.
Battery capacity naturally changes with use, but a sudden runtime drop deserves inspection. Test after cleaning and charging fully, then record whether the problem repeats.
When professional service is the safer option
Choose professional help when you find liquid inside the body, exposed wiring, a burning smell, repeated electrical faults, or a motor that remains noisy after debris is removed. Warranty terms may also require approved service or specific troubleshooting steps.
Stop using the robot if it overheats, smokes, or behaves unpredictably. Routine cleaning should improve a safe appliance, not require risky disassembly.
A clear robot vacuum care guide can be useful when you need model-specific cleaning details, including where to locate the model number for support. Use those instructions alongside the manual rather than substituting a generic routine for them.
Conclusion
Regular robot vacuum maintenance does not need to take long: empty the bin, clear the brushes, care for the filter, wipe the sensors, and inspect the moving parts on a schedule that fits your home. When you test the robot after each deeper cleaning, small changes in suction, navigation, or noise become easier to catch and correct.
Frequently Asked Questions
How often should I clean my robot vacuum?
Check the dustbin and brushes frequently, often after each run or weekly depending on debris levels. Inspect filters, sensors, wheels, and charging contacts regularly and increase the schedule for homes with pets or heavy dust.
Can I wash every robot vacuum filter?
No. Some filters are washable and others must stay dry. Follow the model instructions, and never reinstall a washable filter until it is completely dry.
Why does my robot vacuum leave debris behind?
A clogged filter, full dustbin, tangled brush, blocked intake, or worn brush can reduce collection. Check these parts in sequence before assuming the motor has failed.
Why will my robot vacuum not dock?
Dirty contacts, a blocked approach, a moved dock, sensor dust, or a power issue can prevent docking. Clean the contact areas, clear the route, and confirm that the dock is powered.
How do I remove pet hair from the main brush?
Turn the robot off, remove the brush if instructed, and pull away wrapped hair with your fingers or blunt tweezers. Clean the brush ends and housing before reinstalling it.
Can I use household cleaner on the robot vacuum?
Avoid harsh cleaners and excess moisture. A soft, dry cloth is generally safer for the body, sensors, and charging contacts unless the manufacturer gives different instructions.
When should I replace robot vacuum parts?
Replace filters, brushes, seals, or wheels when they are damaged, badly worn, misshapen, or no longer perform after cleaning. Match every replacement to the exact model.