
Key Takeaways
Descaling removes mineral buildup inside an espresso maker, while routine cleaning handles coffee and milk residue. The safest approach is to follow the machine’s instructions, use the correct solution, rinse generously, and adjust the schedule to your water and usage.
- Descale according to water hardness, machine use, and the manufacturer’s guidance.
- Use an approved descaler whenever the manual or warranty requires one.
- Remove the water filter and empty the machine before starting.
- Run several complete rinse cycles after the solution has passed through.
- Keep up with daily cleaning so descaling is not asked to solve every problem.
- Understand when and why your espresso maker needs descaling
- Gather the right supplies before you begin
- Prepare the espresso maker for descaling
- Run the descaling cycle step by step
- Rinse the machine thoroughly after descaling
- Clean the removable parts and brewing components
- Prevent future mineral buildup and maintenance problems
- Conclusion
- Frequently Asked Questions
- How often should I descale an espresso maker?
- Can I use white vinegar to descale an espresso maker?
- Should I remove the water filter before descaling?
- How many times should I rinse after descaling?
- Is descaling the same as backflushing?
- Can limescale change the taste of espresso?
- What should I do if water still flows slowly after descaling?
- Understand when and why your espresso maker needs descaling
- Gather the right supplies before you begin
- Prepare the espresso maker for descaling
- Run the descaling cycle step by step
- Rinse the machine thoroughly after descaling
- Clean the removable parts and brewing components
- Prevent future mineral buildup and maintenance problems
- Conclusion
- Frequently Asked Questions
- How often should I descale an espresso maker?
- Can I use white vinegar to descale an espresso maker?
- Should I remove the water filter before descaling?
- How many times should I rinse after descaling?
- Is descaling the same as backflushing?
- Can limescale change the taste of espresso?
- What should I do if water still flows slowly after descaling?
Understand when and why your espresso maker needs descaling
Water carries dissolved minerals into the tank, heating system, and internal lines every time you brew. Over time, those minerals can form limescale, which may affect water flow, temperature, and the flavor of the coffee. Learning how to descale an espresso maker is therefore less about a one-time rescue and more about sensible maintenance.
What limescale is and how it affects performance
Limescale is a hard mineral deposit, usually associated with calcium and magnesium in water. It can collect on hidden heating surfaces and inside narrow passages, making it harder for the machine to heat and move water consistently. A scaled machine may still switch on normally, but its brewing behavior can gradually change.
The effect is often subtle at first: a longer wait, a weaker stream, or an espresso that tastes sharper than usual. Mineral deposits can also make the machine work harder, so removing them is part of protecting the equipment as well as the drink.
Signs that mineral buildup is affecting your machine
Watch for changes rather than waiting for a complete blockage. Slow or uneven flow, unusual noise from the pump, inconsistent brewing temperature, and visible flakes in the water are all reasons to inspect your maintenance routine. A sudden change in flavor can also point to residue, although old coffee oils and a dirty group head can create similar symptoms.
A descaling treatment may help with mineral-related symptoms, but it will not replace cleaning coffee oils from the brewing path. If the machine continues to behave poorly after descaling and rinsing, consult its manual or a qualified service professional instead of repeatedly adding solution.
How water hardness changes your descaling schedule
Hard water deposits minerals faster than soft water, and a frequently used machine receives more water exposure. The right interval depends on both factors, along with whether the machine has a filter and what its manufacturer recommends. A local water-hardness report or a simple test strip can give you a useful starting point.
Use this as a planning guide, not a substitute for the manual:
| Water and usage pattern | Practical maintenance approach |
|---|---|
| Soft water, light household use | Follow the machine’s reminder or manual interval |
| Hard water, light household use | Check more often and descale sooner if symptoms appear |
| Soft water, heavy daily use | Track volume and follow the machine’s guidance closely |
| Hard water, heavy daily use | Inspect regularly and expect a shorter interval |
The table is deliberately broad because machines differ. Keep a simple note of the date, water source, and symptoms; that record makes it easier to find a schedule that fits your kitchen.
Descaling versus routine cleaning and backflushing
Descaling targets mineral deposits inside the water and heating system. Routine cleaning removes coffee grounds, oils, milk residue, and collected debris from parts you can reach. Backflushing, where supported by the machine, cleans the group circuit using the appropriate procedure and product; it is not the same as descaling.
For a useful side-by-side explanation, see this difference between cleaning and descaling. Treating these jobs as interchangeable is a common mistake: a spotless portafilter does not prove that the boiler is free of scale, and a descaled machine may still have stale coffee residue around the group head.
Gather the right supplies before you begin
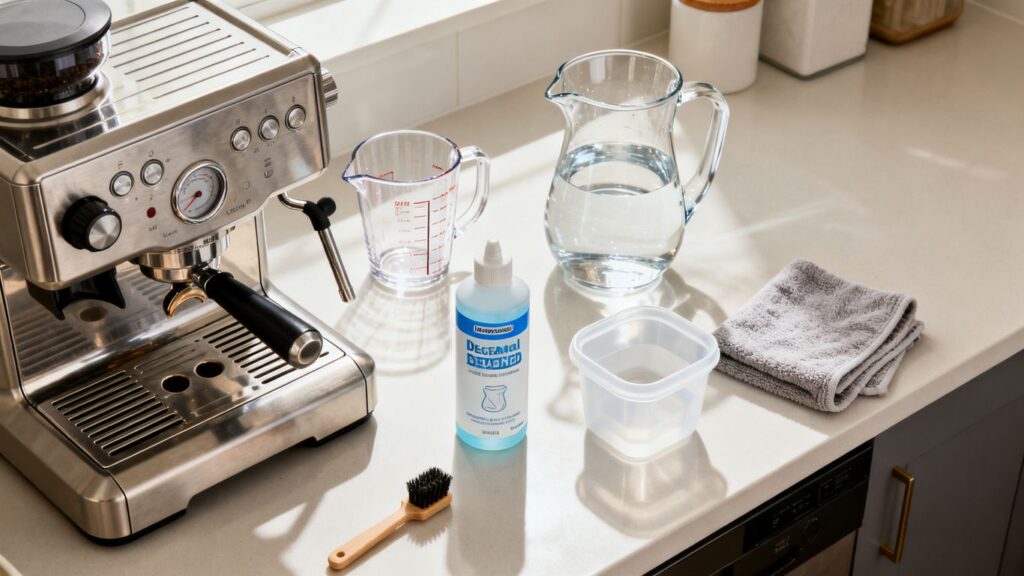
A little preparation keeps the process calm and prevents an improvised mixture from damaging the machine. Gather the solution, fresh water, a container large enough to catch the discharge, and a cloth for splashes. Read the instructions before pouring anything into the reservoir.
Choosing a manufacturer-approved descaling solution
Start with the product named or permitted in the espresso maker’s manual. Commercial descalers vary in concentration, so follow the label rather than guessing how much to dilute. If the machine has an automatic program, its instructions may specify a particular volume or sequence.
An approved product is especially sensible when the machine is under warranty or contains a more complex heating system. The goal is to remove scale without leaving an unnecessarily strong solution in contact with seals, tubing, or metal surfaces.
When to use a homemade vinegar solution
Vinegar is sometimes suggested as a household alternative, but it is not suitable for every espresso maker. It can leave a strong smell or taste, and some manufacturers specifically advise against it. Check the manual first; if it does not permit vinegar, use the recommended descaler instead.
If vinegar is allowed, use only the dilution and process stated by the manufacturer or solution instructions. Never assume that a stronger mixture will work better. A practical overview of household options is available in this coffee machine descaling method, but your own manual remains the final authority.
Preparing fresh water and a suitable container
Have enough clean water for the descaling mixture and the later rinse cycles. A container should hold the liquid released from the group head, hot-water outlet, and steam wand without overflowing. A wide, heat-resistant jug is often easier to position than a narrow bottle.
Keep a towel nearby, but do not place it where it could obstruct a vent or catch on a hot component. If the machine has a removable drip tray, empty it before beginning so its extra capacity is available.
Checking the espresso maker’s manual and warranty requirements
The manual tells you whether the machine has an automatic descaling program, which outlets should be opened, and how the filter should be handled. It may also specify a waiting period, a rinse volume, or a warning about household acids. These details can differ considerably between models.
Warranty terms are another reason to check first. If the instructions require a named solution or service interval, document what you did and keep the product information. That small step is useful if the machine later needs support.
Prepare the espresso maker for descaling
Preparation prevents old coffee, water-filter material, or loose accessories from interfering with the treatment. Turn off the machine and work methodically from the outside in. Do not begin while the boiler, group head, or steam wand is hot.
Remove coffee grounds, water, and accessories
Remove the portafilter and discard the puck or grounds. Empty the water tank, drip tray, and any used-capsule or grounds container, depending on the machine design. Take out accessories that the manual says should not remain in place during descaling.
Rinse the empty tank so loose debris does not become part of the solution. If the machine has a separate milk container, set it aside and clean it according to its own instructions rather than sending descaler through it.
Take out and rinse the water filter
If the reservoir contains a replaceable water filter, remove it before adding descaler unless the manual explicitly says otherwise. The solution can affect filter media, and leaving it installed may reduce the filter’s usefulness. Rinse the filter housing and place the filter somewhere clean while the cycle runs.
Do not discard a reusable filter simply because it was removed. Check whether it needs rinsing, replacement, or reinstallation after the machine has been flushed with clean water.
Allow the machine to cool completely
A machine that has recently brewed or steamed can retain heat in the boiler, group head, and wand. Give it enough time to cool, then handle the outlets carefully. Cooling also makes it easier to remove the portafilter and drip tray without splashing hot water.
Keep children and pets away from the work area. Even a cool-looking outlet can release hot liquid when the pump or valve is opened.
Protecting counters and positioning the drain container
Place the machine on a stable, level surface and put the container under the outlets before starting. Cover a porous countertop with a towel or tray, while leaving ventilation openings clear. Make sure the container can be emptied without moving a heavy, wet machine.
Check the position twice before activating the pump. A few seconds spent aligning the container is easier than cleaning descaler from a counter or cabinet afterward.
Run the descaling cycle step by step
Once the machine is empty and cool, the process is mostly controlled delivery and patience. Follow the machine’s sequence rather than opening every outlet at once. Some models pause automatically; others require you to start and stop the pump manually.
Mix and add the descaling solution
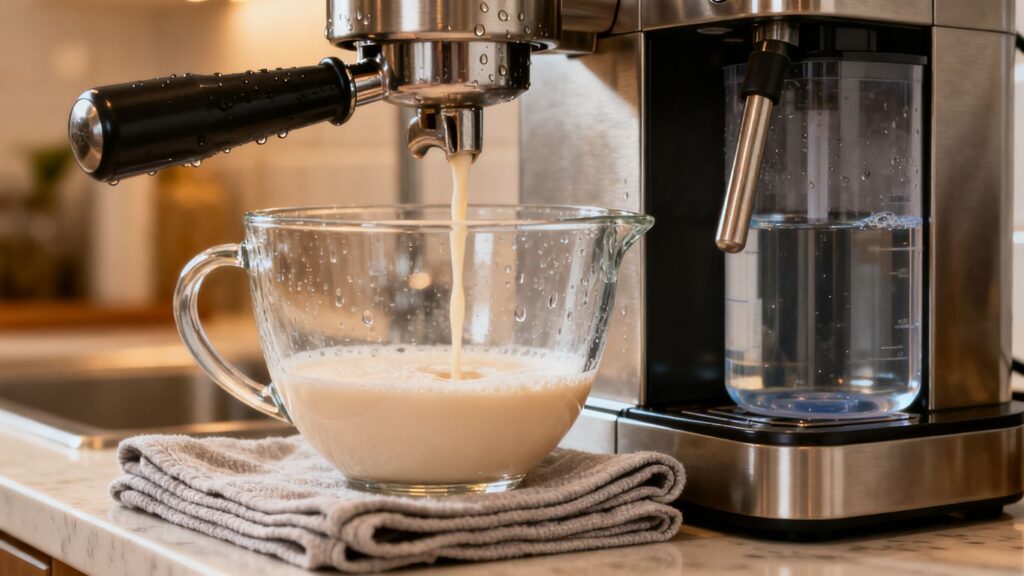
Prepare the solution exactly as directed on the label or in the manual. Use the stated amount of water and mix it in a separate container if that makes accurate measuring easier. Pour the finished mixture into the clean reservoir, taking care not to spill it onto the controls.
Do not combine different descaling products, bleach, detergents, or other cleaners. If the machine has a marked minimum level, make sure the mixture is high enough for the pump to operate without running dry.
Start the machine’s automatic descaling program
For a machine with a dedicated program, select it only after the solution is in the tank and the drain container is positioned. The display may ask you to open a hot-water valve, empty a tray, or confirm a step. Respond to each prompt and stay nearby while liquid is being discharged.
Automatic programs vary in duration and pauses. Do not interrupt one simply because the machine appears quiet; stopping early can leave solution in part of the water path or cause the program to restart from the beginning.
Descaling manual espresso makers without a dedicated cycle
On a manual machine, use the procedure in the manual for drawing solution through the group head and hot-water outlet. Usually, this means running controlled amounts, pausing as instructed, and allowing the solution time to contact internal surfaces. Avoid forcing a blocked pump or leaving the machine unattended.
A step-by-step espresso descaling guide can help you compare the general sequence, but it cannot replace model-specific directions. If liquid does not flow normally, stop and investigate rather than increasing pressure or concentration.
Letting the solution work through the boiler and internal lines
The solution needs time to reach the places where minerals collect. Respect any pause specified by the instructions, keeping the machine powered and positioned safely as required. You may see cloudy liquid or small particles; that can be a sign that deposits are loosening, but it is not a reason to taste or reuse the liquid.
Patience protects the process better than a stronger mixture or repeated pumping. When the cycle finishes, proceed directly to disposal and rinsing so the solution does not sit longer than directed.
Rinse the machine thoroughly after descaling
Rinsing is not an optional final flourish. It removes dissolved minerals and any remaining descaler from the tank, boiler, valves, and outlets. A machine that smells acidic or produces unusual-tasting water has not been rinsed enough yet.
Emptying the used solution safely
Turn off or pause the machine according to its instructions, then empty the drain container carefully. The liquid may be warm and should not be used for drinking or cooking. Dispose of it in accordance with the product label and local wastewater guidance.
Rinse the container before using it again for clean water. Empty the drip tray and tank as well, wiping away any splashes around the machine.
Flushing the water tank and internal components
Wash the reservoir thoroughly with clean water, paying attention to corners and the area around the outlet. Fill it with fresh water and run that water through every outlet used during descaling. Include the group head, hot-water spout, and steam wand if the manual directs you to do so.
This first flush carries out much of the remaining solution. It should be followed by additional full rinses rather than assuming that one tank is sufficient.
Running multiple rinse cycles with clean water
Run as many rinse cycles as the manual specifies, refilling with fresh water each time. If no number is given, continue until the discharged water is clear and free from a chemical smell, while still following the machine’s operating limits. Never allow the pump to run without water.
Keep the container under the outlet and empty it between cycles. Clean water is the part of the process that makes the machine ready to return to coffee preparation.
Checking for lingering taste or descaling residue
After rinsing, run a little water through the machine and smell it. You can brew and discard a small test shot once the manual’s rinse instructions are complete, checking for sour, bitter, or chemical notes. If anything seems unusual, flush again before preparing coffee to drink.
If the taste remains after thorough rinsing, inspect the tank, portafilter, basket, and outlets for residue. Persistent problems may indicate old coffee oils, a filter that needs replacement, or a service issue rather than incomplete descaling.
Clean the removable parts and brewing components
Descaling deals with mineral deposits, but the machine still needs ordinary cleaning around the coffee path. Removing the accessible parts now is convenient because the machine is already empty. Use warm water and a suitable cloth or brush, avoiding abrasive tools that can scratch surfaces.
Washing the portafilter, basket, and drip tray
Rinse the portafilter and basket to remove trapped grounds and coffee oils. Wash the drip tray and its grate separately, then dry the parts before reinstalling them. If the basket has tiny blocked holes, soak it only as directed for your machine and avoid poking them with a sharp object.
Coffee residue can create bitter flavors even when the internal water path is clean. This is why descaling and cleaning should be treated as related but separate jobs.
Cleaning the steam wand and purge openings
Wipe the steam wand immediately after use whenever possible, then purge it according to the machine’s instructions. For a deeper clean, remove the tip only if it is designed to come off and the manual permits it. Clear milk residue from the openings with the correct brush or tool.
Never immerse a connected steam wand or force a blocked opening. If milk has dried inside the wand, stop using it until it has been cleaned safely.
Removing residue from the shower screen
With the machine cool, inspect the shower screen for compacted coffee or mineral particles. Follow the manual before removing any screw, gasket, or screen, since parts and procedures vary. A soft brush and a clean, damp cloth are often enough for surface residue.
Do not use the descaling solution as a general-purpose coffee-oil cleaner. A cleaning product intended for the group circuit is a different treatment and should be used only when the machine supports it.
Reinstalling the water filter and accessories
Once the reservoir and internal path have been rinsed, reinstall a clean or renewed water filter as directed. Return the drip tray, basket, portafilter, and other accessories to their normal positions. Check that seals are seated correctly and that no cloth, brush, or temporary container remains near the machine.
For broader care covering backflushing, milk systems, and grinders, this espresso machine cleaning guide is a useful companion. Reassemble only after each part is clean and dry enough for normal use.
Prevent future mineral buildup and maintenance problems
A descaling cycle works best when it is part of a small, repeatable routine. Use the machine’s reminders, keep track of dates, and pay attention to changes in flow or flavor. Good maintenance is less about doing everything at once and more about not letting small tasks accumulate.
Setting a recurring descaling schedule
Start with the interval in the manual, then adjust based on water hardness and how often you brew. A high-use machine in a hard-water area may need closer observation than a lightly used machine supplied with soft water. Record each treatment so you do not rely on memory.
Do not descale merely because a calendar reminder appears if the machine has a different sensor or program requirement; follow its stated process. Conversely, do not ignore clear symptoms just because the usual date has not arrived.
Using filtered or softened water correctly
Filtered water can reduce the mineral load, but it does not necessarily eliminate it. Replace or maintain the filter on schedule and use only water that the machine’s manual considers suitable. Some bottled waters contain substantial minerals, so “bottled” does not automatically mean “low scale.”
Water quality also affects taste, so choose a source that balances mineral content and machine guidance. Avoid distilled or heavily demineralized water unless the manufacturer explicitly allows it.
Keeping a daily and weekly cleaning routine
A short routine keeps coffee oils and milk residue from becoming stubborn deposits. For many machines, the following sequence is a practical starting point:
- Wipe and purge the steam wand after steaming.
- Rinse the portafilter and basket after brewing.
- Empty and wash the drip tray before it becomes stagnant.
- Brush away loose grounds around the group area.
- Run the machine’s recommended cleaning or backflush cycle when scheduled.
These tasks do not replace descaling, but they make it easier to identify a genuine mineral problem. They also help preserve the flavor of coffee between deeper maintenance sessions.
Avoiding common mistakes that can damage the machine
Never use an unapproved chemical, mix cleaners, overfill the tank, or run the pump dry. Do not force valves, remove parts while they are hot, or leave descaler in the machine longer than directed. If a warning light persists, the pump becomes unusually loud, or flow remains restricted after rinsing, seek model-specific support.
Just Picked publishes practical product buying advice for readers comparing equipment and accessories, but maintenance instructions should always come from the espresso maker’s manufacturer. That distinction helps you make an informed purchase without treating general advice as a repair manual.
Conclusion
Descaling an espresso maker is a manageable maintenance task when you use the right solution, follow the machine’s sequence, rinse thoroughly, and keep coffee and milk residue under control. Match the schedule to your water and usage, and treat unusual performance as a reason to investigate early rather than push the machine harder.
Frequently Asked Questions
How often should I descale an espresso maker?
Use the interval in the manual as your starting point, then consider water hardness, brewing frequency, filter use, and signs of scale. Hard water and heavy use generally call for more frequent checks.
Can I use white vinegar to descale an espresso maker?
Only if the manufacturer permits it. Vinegar can leave odor or flavor and may not be appropriate for some machines, so an approved descaler is usually the safer choice when specified.
Should I remove the water filter before descaling?
Usually, yes, unless the manual says to leave it installed. Removing it prevents the descaling solution from affecting the filter and allows you to rinse or replace the filter separately.
How many times should I rinse after descaling?
Follow the machine’s instructions and use fresh water for each required cycle. Continue until the water is clear and free of chemical odor, without allowing the pump to run dry.
Is descaling the same as backflushing?
No. Descaling removes mineral deposits from the water and heating path, while backflushing cleans the group circuit on machines designed for that procedure. They address different types of residue.
Can limescale change the taste of espresso?
It can contribute to off flavors by affecting water flow and brewing conditions, but stale coffee oils, dirty parts, or leftover descaler can also change taste. Clean and rinse the machine before diagnosing a more serious fault.
What should I do if water still flows slowly after descaling?
Check the filter, basket, shower screen, and outlets for blockages, then review the manual’s troubleshooting steps. If the restriction or unusual pump noise continues, stop using the machine and contact qualified service support.