How to Care for Brass Home Décor Without Damaging the Finish: A Safe Cleaning And Maintenance Guide

Key Takeaways
Brass décor lasts longer when you identify its surface before cleaning and match the method to the finish.
- Check whether the piece is solid brass, plated, lacquered, or brass-tone before polishing.
- Start with dry dusting, mild soap, lukewarm water, and a soft cloth.
- Test any cleaner in a hidden spot before treating the visible surface.
- Treat natural patina differently from grime or unwanted tarnish.
- Keep brass dry, handle it with clean hands, and store it away from abrasives.
- Identify the brass finish before cleaning
- Prepare a safe brass-cleaning routine
- Remove dust and everyday residue gently
- Clean tarnished brass without stripping the finish
- Care for lacquered and plated brass décor
- Prevent future tarnish and finish damage
- Troubleshoot common brass-care problems
- Conclusion
- Frequently Asked Questions
Identify the brass finish before cleaning
Learning how to care for brass home décor without damaging the finish begins with identifying what is actually on the surface. “Brass” may describe solid metal, a very thin plated layer, a lacquered coating, or simply a brass-colored finish. Those materials can look similar at first, but they do not tolerate the same amount of rubbing, moisture, or polish. Spend a few minutes inspecting the piece before you reach for a cleaner.
Solid brass, brass-plated, and brass-tone materials
Solid brass is brass throughout, while brass-plated décor has a thin layer of brass over another metal. Brass-tone items may contain little or no brass at all and are usually finished with paint, coating, or another decorative layer. A plated or brass-tone surface can be damaged by repeated polishing long before a solid brass object shows similar wear.
Look at edges, corners, screw heads, and the underside. If a yellow-gold surface gives way to a silvery or gray metal at a worn spot, treat the piece as plated or coated. A magnet can offer a clue: it may be attracted to an iron or steel core, although the result is not a complete material test. When you are unsure, use the gentlest cleaning method and avoid abrasive polishing.
Lacquered and unlacquered brass
Lacquered brass has a clear protective coating that separates the metal from air, moisture, and fingerprints. It usually keeps a more even color and should be cleaned as a coated surface, not buffed as bare metal. Unlacquered brass is exposed to the air, so it naturally darkens, changes color, and develops patina over time.
A consistent, glossy film, especially around protected areas, can indicate lacquer. Uneven darkening and quick changes after handling are more typical of unlacquered brass. Do not scratch the surface to test it; a scratch tells you little and may create permanent damage.
How patina changes the care approach
Patina is a gradual change in color and tone caused by exposure and handling. It can be part of the character of an older object or an intentional look on newer décor. Tarnish, greasy residue, and dust may sit over that patina, so cleaning does not always mean making the entire piece bright and uniform.
Decide what you want before you begin. If you like the aged appearance, remove surface dirt while leaving the deeper tone in place. If you want a brighter finish, work slowly and stop often to check whether you are removing tarnish or valuable character.
Simple tests to identify the surface safely
Begin with the least invasive checks: read the care label, inspect an unexposed edge, and compare the color of protected and handled areas. A cotton swab dampened with plain water can show whether residue transfers, but it should not be used to scrub. You can also observe whether a small amount of mild soapy water changes the surface; blot it dry immediately.
Keep tests small and hidden. If the coating becomes cloudy, color transfers to the cloth, or the metal changes sharply, stop and use only dry dusting until you can identify the finish more reliably. A careful test is slower than a guess, but it is much easier than repairing a stripped surface.
Prepare a safe brass-cleaning routine
A safe routine is deliberately simple. You need a clean work area, soft materials, modest amounts of moisture, and enough time to inspect your progress between steps. Gather everything before you start so you are not tempted to improvise with a rough sponge or a strong household chemical.
If you are shopping for replacement décor or cleaning accessories, home décor deals can be a convenient place to compare current offers. A lower price is useful, but the material and care instructions still matter more than the discount.
Gather soft, nonabrasive supplies
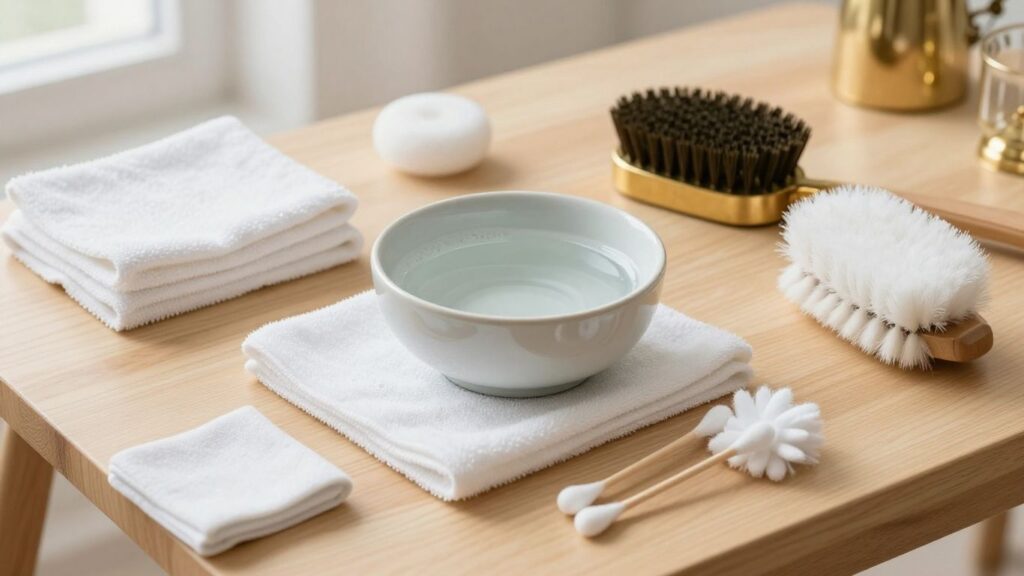
Use a clean microfiber cloth or another soft, lint-free cloth, a soft-bristled brush, a small bowl, mild dish soap, and lukewarm water. Cotton swabs can reach narrow details, while a dry towel helps you remove moisture promptly. Keep separate cloths for cleaning and drying so grit from the first pass does not get rubbed back over the surface.
Avoid steel wool, rough scrubbing pads, stiff metal brushes, and powders with gritty particles. Even a product marketed for metal can be too aggressive for lacquer, plating, or a deliberately aged finish. The safest supply is often the one that lets you lift residue rather than grind it away.
Protect surrounding surfaces and hardware
Remove detachable pieces when possible and place small hardware in a shallow tray. Cover wood, stone, fabric, and painted surfaces around the décor because water and cleaner residue can mark them. If the item has moving parts, electrical components, glued details, or porous inserts, keep moisture away from those areas.
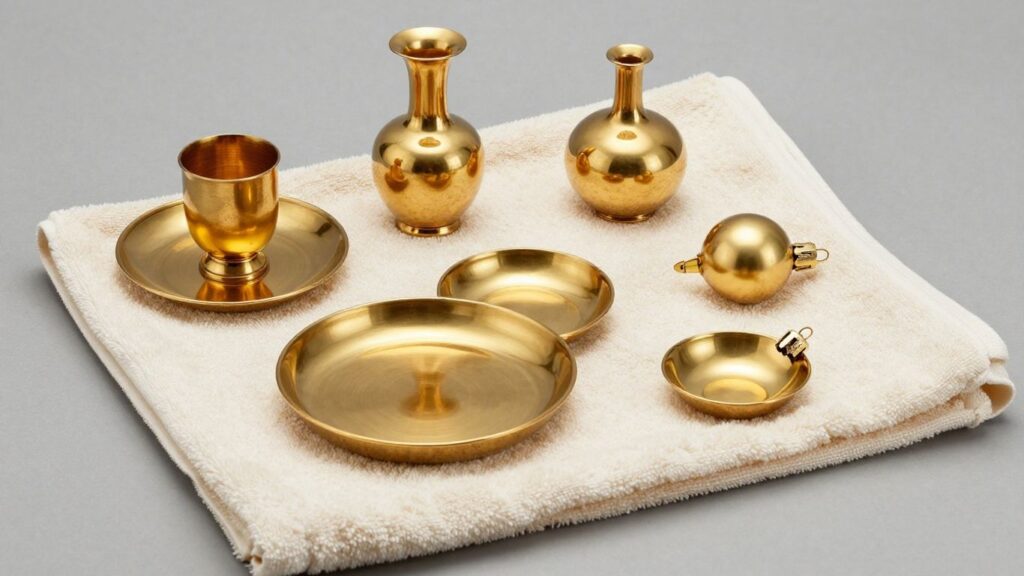
Work on a folded towel to prevent scratches and keep the object from sliding. Do not spray cleaner directly onto brass; apply a small amount to the cloth instead. This gives you better control around seams and prevents liquid from collecting where it cannot dry.
Test products on an inconspicuous area
Before cleaning the front, test your chosen method on the back, underside, or an inner corner. Leave the test area long enough to observe changes in sheen and color, then wipe and dry it completely. A cleaner that seems mild can still soften lacquer, lift color, or reveal worn plating.
Use only a small amount during the test. If the cloth picks up a strong yellow or green color, the surface feels tacky, or the finish turns dull, stop. For a broader look at choosing products around the home, a practical product comparison guide can help you weigh material, use, and long-term care instead of choosing by price alone.
When to avoid commercial brass polish
Skip commercial polish when the item is lacquered, plated, painted, antique, highly textured, or intentionally patinated unless its care instructions specifically allow it. Polish may remove more than tarnish, particularly when you need repeated pressure to get a result. It can also collect in grooves and leave a hazy residue.
If the finish is unknown, begin with dry dusting and mild soapy water. Promo Deals can help you find household offers, but a deal on polish is not a reason to use it on every brass-looking object. Match the product to the finish, not to the label’s promise of shine.
Remove dust and everyday residue gently
Most brass décor does not need a dramatic restoration each time it looks dull. Dust, skin oils, cooking residue, and small water marks can often be removed before they harden into a more difficult cleaning problem. Gentle, frequent care usually creates less risk than occasional aggressive polishing.
Use dry dusting for routine maintenance
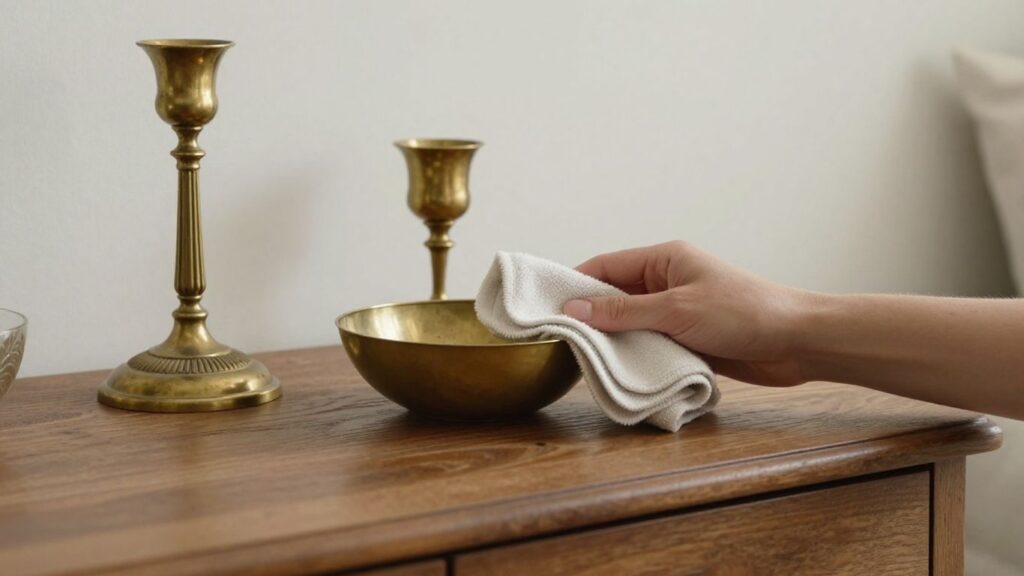
Start with a dry, soft cloth and light pressure. Fold the cloth so you are always using a clean section, and work around rather than across delicate raised details. For a ridged object, a soft brush can lift dust from crevices without forcing it deeper into the design.
Dusting once a week or whenever you clean nearby surfaces is often enough for display pieces. Hold the object securely rather than dragging it across furniture. If dust is mixed with grease, do not keep rubbing; move to a small amount of diluted soap and water.
Clean with mild soap and lukewarm water
Add only a few drops of mild dish soap to a bowl of lukewarm water. Dampen a soft cloth, wring it well, and wipe a small area at a time. Follow with a second cloth lightly dampened with plain water to remove soap, then dry immediately.
The cloth should be damp, not dripping. Avoid soaking brass, especially where parts join or where a finish may have lifted. Short, gentle passes are safer than pressing harder when residue does not disappear at once.
Handle textured, engraved, and delicate details
Details need a slower approach because residue can hide in recesses while a cloth catches on raised edges. Use a soft-bristled brush with very little moisture, and guide it in the direction of the engraving rather than scrubbing across it. Cotton swabs can help with narrow grooves, provided they do not shed fibers.
Do not use pointed tools to dig out dirt. They can scratch the finish and leave a bright line that becomes more visible as the piece ages. For woven, porous, or glued decorative elements, clean only the brass areas you can reach without wetting the surrounding material.
Dry brass completely to prevent water spots
Drying is part of cleaning, not an optional final touch. Press a soft towel against the surface, then inspect seams, feet, ridges, and the underside for trapped droplets. Let the object air-dry in a well-ventilated place only after you have removed visible moisture.
Water spots often come from minerals left behind as droplets evaporate. If one appears, use a barely damp cloth to lift it and dry again rather than polishing the mark aggressively. This habit also reduces the chance that moisture will remain against a plated or lacquered edge.
Clean tarnished brass without stripping the finish
Tarnish deserves a measured response. Some darkening is part of the material’s natural aging, while other discoloration comes from residue, moisture, or chemical contact. Before trying to restore brightness, compare the affected area with the look you want and consider whether an even aged finish may be more attractive than a newly polished one.
When a gentle polish is appropriate
A gentle brass polish is most appropriate for confirmed solid, unlacquered brass when you genuinely want to reduce tarnish. Apply a small amount to a soft cloth rather than spreading a thick layer across the object. Work in a small section, use light pressure, and wipe away residue before deciding whether another pass is necessary.
Read the product directions and follow the shortest recommended contact time. Keep polish away from lacquer, porous materials, seams, and plated areas. If the surface improves after one light pass, stop there; more shine is not always a better finish.
Natural cleaning methods and their limitations
Household methods involving acidic foods or vinegar are often suggested for tarnish, but they are difficult to control. Their strength, contact time, and residue can vary, and an acid may affect plating, lacquer, soldered joints, or an existing patina. A paste can also become abrasive if its particles are rubbed into the surface.
For that reason, use plain soapy water for ordinary residue and reserve any stronger approach for confirmed solid brass after a hidden-spot test. If you choose a natural method, keep the contact brief, rinse carefully, and dry fully. Never assume that a kitchen ingredient is harmless simply because it is familiar.
Why abrasive powders and harsh acids can damage brass
Abrasive powders remove material through friction, while harsh acids can react quickly with the surface and create uneven color. Either approach may leave fine scratches, dull patches, or exposed metal beneath a thin finish. The damage is especially easy to see on smooth décor where light reflects across the surface.
The safest way to increase cleaning strength is usually to improve control, not force. Work in smaller areas, change to a clean cloth, and pause to inspect the result. If tarnish does not respond to gentle treatment, the object may need professional assessment rather than a stronger product.
Preserve desirable patina instead of removing it
Patina can give brass depth, particularly around edges, recesses, and engraved details. To preserve it, clean only loose dust and greasy residue, then stop when the surface looks even and cared for. Avoid trying to make every part the same bright color.
A useful rule is to remove what clearly does not belong while leaving stable color that contributes to the object’s appearance. A dedicated patina-preservation guide offers another perspective on distinguishing natural aging from dirt and over-polishing. Take before-and-after photos if you are unsure; the comparison makes subtle changes easier to judge.
Care for lacquered and plated brass décor
Lacquer and plating change the cleaning rules because the visible surface may be a coating rather than exposed brass. Lacquer can cloud or peel, while plating can wear through at corners and contact points. Treat both as finishes that need protection, even when the underlying metal appears sturdy.
Clean lacquered brass without clouding the coating
Use a dry cloth first, then a barely damp cloth with mild soap if needed. Keep the surface wet for as little time as possible and dry it immediately. Do not use brass polish unless the manufacturer specifically says it is compatible with the lacquer.
Cloudiness, stickiness, flaking, or a patchy sheen means the coating may already be compromised. Stop rubbing those areas and avoid trying to make them match the rest of the piece. A coating that has begun to fail may need removal and refinishing rather than more cleaning.
Prevent brass plating from wearing through
Plated brass needs light contact and infrequent wet cleaning. Do not buff corners, edges, or handles repeatedly, because those areas often have the thinnest coverage and receive the most touch. Use a soft cloth to lift fingerprints instead of polishing until the surface shines.
If silver-colored metal shows through, treat the exposed area as vulnerable. More polishing will not restore the plating; it can enlarge the worn patch. Keep the item dry and consider professional advice if the exposed section is prominent or continues to spread.
Address chips, peeling, and exposed metal
Chips and peeling should not be sealed casually with household glue or a random clear coat. Trapped moisture can worsen discoloration, while an incompatible coating may leave a more visible repair. Photograph the damage and note where it appears before deciding what to do next.
For a small decorative object, you may choose to leave minor wear alone if it is stable. If the piece is valuable, frequently handled, or structurally affected, stop cleaning and consult a restorer. The goal is to prevent a surface problem from becoming a larger refinishing problem.
Know when professional refinishing is safer
Professional help makes sense when the finish is valuable, the material is uncertain, or the coating is peeling across a large area. It is also safer for antique décor, complex assemblies, and pieces with mixed materials. A restorer can assess what remains before removing a finish that may be difficult to replace.
Before handing over the item, ask what will be removed, whether the original patina can be retained, and how the new finish will be maintained. Promo Deals is useful for finding offers on many household purchases, but refinishing is one area where experience and material knowledge matter more than finding the lowest price.
Prevent future tarnish and finish damage
Prevention does not require displaying brass under glass. It means reducing the moisture, oils, chemicals, and friction that accelerate change. Small habits—especially drying after handling and cleaning spills promptly—can keep a gentle maintenance routine from becoming a restoration project.
Control moisture, fingerprints, and household chemicals
Handle brass with clean, dry hands when you can, particularly if the piece is unlacquered. Wipe fingerprints from frequently touched areas with a soft cloth before oils sit on the surface. Keep brass away from direct splashes, steam, salt residue, hair products, and household cleaners.
Never let disinfectant, bleach, ammonia, or an acidic cleaner remain on brass. If accidental contact occurs, wipe the area with a clean damp cloth, then dry it completely. Do not layer another chemical over the first one in an attempt to correct the mark.
Use proper storage for seasonal décor
Wrap clean, dry brass in soft acid-free tissue or a smooth cotton cloth and store it in a dry place. Give each piece space so metal edges do not rub together. Avoid damp basements, unventilated plastic bags, and direct contact with cardboard or rough packing materials.
Add padding around handles and projections, but do not wrap an object while it is still damp. When you unpack it, inspect for spots before placing it back on display. Early, gentle cleaning is easier than removing residue that has sat for months.
Keep brass away from abrasive materials
Do not place brass directly against gritty shelves, unfinished wood, ceramic edges, or rough stone. Felt or a smooth fabric pad under a vase or sculpture can prevent tiny movement scratches. Lift décor when moving it instead of sliding it across a surface.
Keep cleaning cloths free of sand, dust, and polish residue. One grain caught in a cloth can create a visible line when pressure is applied. This is especially relevant to polished solid brass and any plated area that is already thin.
Establish a practical maintenance schedule
A simple schedule prevents over-cleaning. Dust display pieces weekly, wipe fingerprints when you see them, and use mild soap only when dry cleaning no longer removes the residue. Inspect seasonal items at storage and again when they return to use.
The schedule should follow the object’s environment rather than a rigid calendar. A brass lamp near a kitchen may need more frequent wiping than a sculpture in a dry room. Keep a note of what method worked so you do not test a new product unnecessarily each time.
Troubleshoot common brass-care problems
Most brass-care problems become easier when you stop, identify the finish, and return to the mildest method. Do not keep rubbing simply because the first pass did not work. A pause lets you distinguish removable residue from permanent wear, coating damage, or patina that should remain.
Remove fingerprints and light water marks
For fingerprints, start with a dry microfiber cloth and wipe in one direction with light pressure. If the mark remains, use a barely damp cloth with diluted mild soap, then wipe with plain water and dry immediately. This is usually enough for unlacquered brass that has not developed heavy tarnish.
For a water mark, avoid circular scrubbing and strong acid. A clean damp cloth can soften the mineral residue, while prompt drying prevents a second ring from forming. If the mark remains after two gentle attempts, inspect whether the finish itself has changed.
Handle stubborn tarnish and dark spots
Stubborn tarnish may require a carefully selected polish on confirmed solid, unlacquered brass, but dark spots can also signal corrosion, chemical exposure, or worn plating. Test first and work in small sections. Stop if the color becomes uneven or the cloth begins removing the finish rather than surface residue.
Do not assume that every dark area needs to disappear. If the spots form an attractive, stable patina, a light cleaning around them may preserve the piece’s character. When the material or history is uncertain, professional assessment is safer than escalating to harsher chemicals.
What to do after accidental over-polishing
If you have over-polished brass, stop using polish and do not try to correct the patch by brightening the surrounding area. Wipe away residue with a soft, slightly damp cloth, dry the object, and photograph the surface in natural light. This helps you see whether the issue is haze, uneven color, scratches, or exposed plating.
Minor unevenness may soften visually as the piece ages, especially on unlacquered solid brass. Scratches, stripped lacquer, and exposed base metal are different problems and may require refinishing. Keep the object away from moisture while you decide on the next step.
When replacement or restoration is the best option
Replacement may be sensible when a low-cost, heavily worn item has lost its coating across most of the surface. Restoration is more appropriate when the object has sentimental, historical, or financial value. Consider the material, extent of damage, repair cost, and whether the original appearance can realistically be recovered.
If you are comparing a replacement, use a careful buying approach: confirm the material, finish, care instructions, and expected exposure before focusing on price. Promo Deals can make relevant home purchases easier to find, but a well-matched finish and manageable care routine are what protect the value of the choice.
Conclusion
Brass décor is easiest to protect when you clean according to its finish rather than chasing maximum shine. Identify the material, begin with a soft dry cloth, use mild moisture sparingly, and stop when the surface looks clean and intentional. With steady handling and sensible storage, you can preserve both bright finishes and character-rich patina without unnecessary damage.
Frequently Asked Questions
How often should you clean brass home décor?
Dust brass weekly or as needed, and remove fingerprints promptly. Use mild soap and water only when dry dusting no longer removes residue, since unnecessary polishing can wear finishes.
Can you clean brass with soap and water?
Yes, mild soap and lukewarm water are suitable for many brass surfaces when applied with a damp, well-wrung cloth. Avoid soaking the item and dry it completely afterward.
How can you tell if brass is plated?
Inspect edges, corners, and hidden areas for a different-colored metal beneath the gold tone. A magnet may indicate a steel or iron core, but it is only a clue, not a definitive test.
Should you remove patina from brass?
Not necessarily. Patina can be a desirable part of an object’s appearance. Remove loose dirt and greasy residue while leaving stable, attractive darkening if you want to preserve the aged look.
Is vinegar safe for cleaning brass?
Vinegar can be too aggressive or difficult to control on lacquered, plated, antique, or patinated brass. If you consider an acidic method for confirmed solid brass, test it in a hidden spot first and rinse and dry carefully.
What should you avoid using on brass?
Avoid steel wool, metal brushes, rough pads, gritty powders, and harsh acids. Also keep bleach, ammonia, and strong household cleaners away from brass because they can damage metal or protective coatings.
What should you do if brass plating wears off?
Stop polishing the area and keep it dry. If the exposed metal is noticeable or the piece is valuable, consult a professional restorer; additional rubbing will not replace missing plating and may enlarge the worn section.